Maintaining the cleanliness and hygiene of mobility aids is crucial for users who depend on these devices for daily activities. Proper cleaning and disinfection practices not only prolong the life of the equipment but also play a significant role in preventing infections and ensuring user safety. In this article, we will explore effective methods to clean and disinfect various types of mobility aids, drawing attention to best practices and practical tips that can help keep these essential devices sanitary and safe for use.
Importance of Regular Cleaning and Disinfection
Regular cleaning and disinfection of mobility aids are paramount for several reasons. These practices not only extend the lifespan of the equipment but also significantly reduce the risk of infection and ensure user safety. Here’s why regular maintenance is essential:
Preventing Infections
- Bacterial Growth: Mobility aids can become breeding grounds for bacteria if not cleaned regularly. Regular disinfection can prevent harmful bacterial growth that can lead to infections.
- Virus Prevention: Especially in shared or communal environments, viruses can easily transfer from one person to another via mobility aids. Disinfection helps eliminate these pathogens.
Prolonging Equipment Lifespan
- Wear and Tear Reduction: Dirt and grime can cause mechanical parts to deteriorate faster. Regular cleaning can help in reducing wear and tear, thereby extending the lifespan of the mobility aid.
- Material Preservation: Cleaning helps preserve the materials (like metal, plastic, and fabric) used in the construction of mobility aids, preventing them from degrading over time.
Ensuring User Safety
- Improved Functionality: Clean mobility aids function better. For instance, wheels and brakes on wheelchairs and walkers work more efficiently when free of debris.
- Preventing Slips and Falls: Residue and buildup on handles and other surfaces can make them slippery, posing a safety risk. Regular cleaning ensures that all surfaces are safe to use.
Enhancing Comfort and Aesthetics
- Better User Experience: Clean aids are more comfortable to use and maintain a pleasant appearance, which can boost the user’s confidence and satisfaction.
- Odor Control: Regular cleaning prevents unpleasant odors that can develop from prolonged use without proper hygiene.
In conclusion, the importance of regular cleaning and disinfection of mobility aids cannot be overstated. By incorporating these practices into your routine, you ensure the health, safety, and comfort of the user while also protecting your investment in these essential devices.
General Cleaning Guidelines for Mobility Aids
Cleaning your mobility aid regularly is essential to maintain its functionality and ensure user safety. Here are some general guidelines for effectively cleaning and disinfecting various types of mobility aids:
Gather Your Supplies
- Mild Detergent: Use a gentle, non-abrasive detergent suitable for all materials.
- Disinfectant Wipes or Solution: Choose products that are effective against a broad spectrum of microorganisms.
- Soft Cloths or Sponges: Opt for non-abrasive materials to avoid scratching surfaces.
- Brushes: Use soft-bristled brushes for hard-to-reach areas.
Preparation
- Check Manufacturer's Instructions: Always start by reviewing the manufacturer's cleaning recommendations to avoid damaging the equipment.
- Disassemble Parts if Possible: Remove detachable parts like cushions, footrests, and other accessories for more thorough cleaning.
Basic Cleaning Steps
- Dust and Debris Removal: Begin by wiping down the entire mobility aid with a dry cloth to remove loose dirt and debris.
- Surface Cleaning: Using a cloth or sponge dampened with a mild detergent solution, wipe all surfaces thoroughly. Avoid soaking any electronic components.
- Cleaning Crevices: Use a soft-bristled brush to clean small crevices and joints where dirt can accumulate.
Disinfection Process
- Apply Disinfectant: After cleaning, use disinfectant wipes or a solution to sanitize all surfaces. Pay particular attention to high-contact areas such as handles and armrests.
- Allow to Air Dry: Let the disinfected parts air dry completely before reassembling or using the mobility aid.
Final Steps
- Inspect for Damage: While cleaning, check for any signs of wear and tear that may need repair.
- Reassemble Carefully: Ensure all parts are securely reattached and that the mobility aid is functioning correctly.
By following these general cleaning guidelines, you can maintain the hygiene, functionality, and longevity of your mobility aids, thereby ensuring a safer and more comfortable experience for the user.
How to Clean and Disinfect Walkers and Rollators
Cleaning and disinfecting walkers and rollators is essential to ensure both the hygiene and functionality of these mobility aids. Here’s a step-by-step guide to help you maintain them properly:
Supplies Needed
- Mild Detergent: A gentle, non-abrasive cleaner safe for metal and plastic.
- Disinfectant Wipes or Solution: Effective against a broad range of pathogens.
- Soft Cloths and Sponges: Non-abrasive to prevent scratching surfaces.
- Brushes: Soft-bristled brushes for cleaning crevices.
- Water: Preferably warm, to aid in removing dirt and grime.
Preparation
- Review Manufacturer’s Instructions: Check the specific cleaning guidelines provided by the manufacturer to avoid damaging the walker or rollator.
- Disassemble if Necessary: Remove detachable parts like baskets, trays, and cushions for thorough cleaning.
Cleaning Steps
- Remove Loose Debris: Start by wiping down the walker or rollator with a dry cloth to remove dust and loose dirt.
- Surface Cleaning: Mix mild detergent with water and use a soft cloth or sponge to clean all surfaces. Pay special attention to areas that come into frequent contact with hands.
- Clean Wheels and Brakes: Use a brush to scrub the wheels and brakes, ensuring they are free from dirt and grime. This step is crucial for maintaining functionality.
Disinfection Process
- Apply Disinfectant: After cleaning, use disinfectant wipes or a solution to sanitize all surfaces, focusing on high-touch areas such as handles and grips.
- Dry Thoroughly: Allow all parts to air dry completely before reassembling the walker or rollator.
Final Checks
- Inspect for Wear and Tear: While cleaning, check for any signs of damage or wear that may need repair or replacement.
- Reassemble Securely: Ensure all parts are securely reattached and that the walker or rollator is functioning correctly.
By following these steps, you can keep your walker or rollator clean, disinfected, and in optimal working condition, thereby enhancing the safety and comfort of the user.
Maintaining Canes and Crutches: Best Practices
Maintaining canes and crutches is essential to ensure their longevity and to safeguard the user against infections. Here are best practices for cleaning and disinfecting these mobility aids:
Supplies Needed
- Mild Soap or Detergent: A gentle cleaning agent safe for metal, plastic, and rubber.
- Disinfectant Wipes or Solution: Effective against bacteria and viruses.
- Soft Cloths and Sponges: Non-abrasive materials to protect surfaces.
- Brushes: Soft-bristled brushes for intricate areas.
- Water: Warm water is preferable for effective cleaning.
Preparation
- Review Manufacturer’s Guidelines: Always start by checking the manufacturer’s cleaning recommendations to avoid damaging the canes or crutches.
- Disassemble if Possible: Remove any detachable parts like grips or tips for a more thorough cleaning.
Cleaning Steps
- Remove Surface Dirt: Begin by wiping down the cane or crutch with a dry cloth to remove dust and loose dirt.
- Wash with Soap and Water: Mix mild soap or detergent with water and use a soft cloth or sponge to clean all surfaces. Focus on high-contact areas such as handles and grips.
- Scrub the Tips and Ferrules: Use a brush to clean the rubber tips and ferrules, ensuring they are free from dirt and debris. This step is crucial for maintaining traction and safety.
Disinfection Process
- Apply Disinfectant: After cleaning, use disinfectant wipes or a solution to thoroughly sanitize all surfaces, especially high-touch areas.
- Allow to Air Dry: Let all components air dry completely before reassembling.
Final Checks
- Inspect for Damage: While cleaning, check for any signs of wear or damage, particularly on the grips and tips, and replace if necessary.
- Reassemble Securely: Ensure all parts are securely reattached and that the cane or crutch is functioning correctly.
By adhering to these best practices, you can keep your canes and crutches clean, disinfected, and in top condition, thereby enhancing the safety and well-being of the user.
Sanitizing Mobility Scooters: Steps and Tips
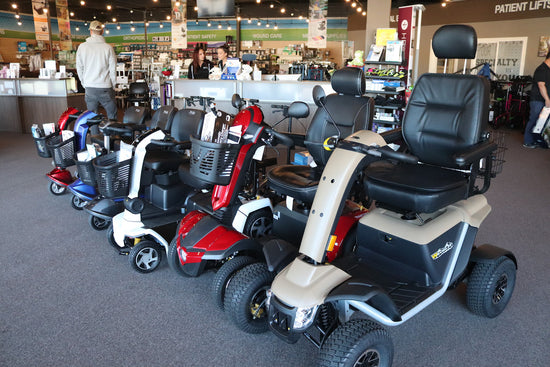
Sanitizing mobility scooters is crucial to ensure their longevity and protect users from infections. Here are the steps and tips for effective cleaning and disinfection:
Supplies Needed
- Mild Detergent: A non-abrasive cleaner suitable for plastic and metal.
- Disinfectant Wipes or Solution: Effective against a broad spectrum of bacteria and viruses.
- Soft Cloths and Sponges: Non-abrasive materials to avoid scratching surfaces.
- Brushes: Soft-bristled brushes for small crevices.
- Compressed Air Canister: For removing dust from electronics.
- Water: Preferably warm to aid in removing grime.
Preparation
- Review Manufacturer’s Instructions: Always start by checking the manufacturer’s guidelines to prevent damage to the scooter's components.
- Turn Off and Unplug: Ensure the scooter is turned off and unplugged before cleaning to avoid any electrical hazards.
- Disassemble if Necessary: Remove detachable parts like seats, baskets, and footrests for thorough cleaning.
Cleaning Steps
- Dust Removal: Use a dry cloth or compressed air canister to remove loose dirt and dust from the scooter, especially around the control panel and electronic components.
- Surface Cleaning: Mix mild detergent with water and use a soft cloth or sponge to clean all surfaces, avoiding excessive water near electronic parts. Focus on high-touch areas like the handlebars and seat.
- Clean Wheels and Undercarriage: Use a brush to scrub the wheels and undercarriage, ensuring they are free from dirt and debris that could affect performance.
Disinfection Process
- Apply Disinfectant: After cleaning, use disinfectant wipes or a solution to thoroughly sanitize all surfaces, paying special attention to high-contact areas.
- Dry Completely: Allow all parts to air dry completely before reassembling and using the scooter. This prevents moisture buildup which can cause damage.
Final Checks
- Inspect for Wear and Tear: While cleaning, check for any signs of damage or wear, particularly on tires, brakes, and grips.
- Reassemble Carefully: Ensure all parts are securely reattached and that the scooter is functioning correctly.
By following these steps and tips, you can keep your mobility scooter clean, disinfected, and in optimal working condition, enhancing both the safety and comfort of the user.
Signs That It’s Time to Replace Your Mobility Aid
Recognizing when to replace your mobility aid is crucial for maintaining user safety and comfort. Here are the key signs that indicate it may be time to invest in a new device:
Signs of Wear and Tear
- Visible Cracks or Breaks: Any visible damage to the frame, handles, or other structural components can compromise the safety and functionality of the aid.
- Worn Out Grips: Handle grips that are worn, cracked, or slipping can reduce stability and increase the risk of falls.
- Damaged Wheels or Tips: For walkers, rollators, and wheelchairs, check for flat spots, cracks, or excessive wear on wheels and tips that can affect maneuverability.
Decreased Performance
- Frequent Repairs Needed: If you find yourself constantly repairing parts, it may be more cost-effective and safer to replace the entire aid.
- Reduced Stability: A mobility aid that wobbles, sways, or feels unstable can be dangerous and should be replaced immediately.
- Difficulty in Use: Increased difficulty in using the aid, such as harder-to-operate brakes or joints that no longer move smoothly, is a clear indication that replacement is necessary.
Hygiene Concerns
- Permanent Stains or Odors: Persistent stains or odors that remain despite thorough cleaning suggest that the material has degraded and is no longer hygienic.
- Broken or Missing Parts: Missing parts like rubber tips on canes or footrests on wheelchairs can lead to hygiene issues and compromise safety.
User Feedback
- User Discomfort: Complaints of discomfort, pain, or difficulty using the aid are strong indicators that a new, better-suited device is needed.
- Changes in User Needs: If the user’s condition has changed, requiring a different type of support, it’s essential to upgrade to a more appropriate mobility aid.


